|
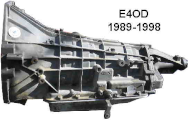
E4OD Transmission Removal: |
|
|
Done |
|
|
1. Disconnect battery negative cable from all batteries.
|
|
2. WARNING:
|
|
|
2. Raise vehicle using quality floor jack rated for vehicle weight.
|
|
3. Remove inspection cover bolts and remove cover to expose flexplate.
|
|
4. CAUTION: Rotate flywheel in same direction the engine normally turns.
|
|
|
4. Remove all torque converter nuts
|
|
|
5. Remove transmission pan bolts, remove pan, drain fluid and remove debris and metal from magnet.
|
|
|
6. Reinstall pan using at least 4 bolts.
|
|
|
7. CAUTION: Verify negative cable on battery is disconnected any starter wire or bolts.
|
|
|
7. Remove cable(s) and bolts on starter - Remove Starter.
|
|
|
8. Remove top bell housing bolts. (Sometimes using swivel ratchet or wrench & small cheater bar)
|
|
|
9. Remove shifter linkage or cable from shifter lever & transmission case (if applicable).
|
|
|
10. Place transmission in Neutral (2 clicks from park position).
|
|
|
11. Remove two bolts retaining Manual Lever Position Sensor (MLPS) and remove sensor.
|
|
|
12. Disconnect MLPS Connector from sensor. (only use fingers - not a screwdriver)
|
|
|
13. Remove 2 nuts/bolts securing rear transmission mount to cross-member.
|
|
|
14. Remove speedometer cable and/or Vehicle Speed Sensor (VSS) from transmission housing.
|
|
|
15. Remove u-joint nuts at rearend (double bag u-joint at rear of drive shaft secure with tape.)
|
|
|
16. Remove driveshaft(s).
|
|
|
17. Remove both cooler lines at transmission.
|
|
|
18. CAUTION:
|
|
|
18. Remove solenoid bulkhead electrical connector above pan rail - rear passenger side of transmission.
|
|
|
19. Remove exhaust pipe and muffler to the extent necessary to allow transmission removal.
|
|
|
20. CAUTION: Use only a quality trans-cage & jack or transmission jack rated for E4OD.
|
|
|
20. Place trans-cage / jack under pan rails and secure properly.
|
|
|
21. Lift transmission about 1-1/2" - 2" as gauged at rear tip of transmission.
|
|
22. Remove all cross-member bolts and nuts, remove cross-member.
|
|
23. Remove rear transmission mount from tailshaft.
|
|
24a. CAUTION: Prior to lowering transmission, verify all hoses and wires are long enough.
|
|
24b. CAUTION:
|
|
24. Lower transmission about 4" from lifted position gauged at rear tip or transmission.
|
|
25. Just support / block up engine at rear of oil pan at this point (do not raise engine)
|
|
|
26 CAUTION:
|
|
|
27. Remove all but, the 2 transmission to engine bolts (3 threads in engine).
|
|
|
28. Push transmission jack, transmission & converter back about 1/2" (inch).
|
|
|
29. CAUTION:
|
|
|
29. Pry torque converter back from flexplate using flathead screwdriver.
|
|
|
30.Again, verify that you have even gaps between bellhousing and engine, this is very important.
|
|
|
31. CAUTION:
|
|
31. Carefully move transmission at tailshaft side to side a little to clear dowel pins on engine.
|
|
32. Carefully remove the 2 remaining bellhousing bolts.
|
|
33. Carefully push transmission & torque converter away from engine block.
|
|
34. Lower transmission a little once torque converter is clear of flexplate.
|
|
35. Carefully push transmission back some more.
|
|
36 WARNING:
|
|
|
36. Lower transmission all the way down when possible.
|
|
37. Reinstall nuts back on torque converter studs.
|
|
38 CAUTION:
|
|
|
38. Remove torque convert from transmission.
|
|
39. Place torque converter in quality plastic bag.
|
|
40. WARNING: GET HELP IF YOU NEED TO PULL TRANSMISSION OFF JACK !!!!!!
|
|
40. Carefully slide transmission off front of jack and/or remove from under vehicle.
|
|
** Teflon® Is a registered Trademark/Tradename of Dupont Corporation.
|
|


